6.4. Endpoints

Endpoint is uniquely identified terminal in Payment Gateway, which is assigned to the Merchant and has to be provided in the commands within Payment Gateway API.

Endpoint search and KPI

This screen contains all Endpoints created for the Merchant in the system:

pic102 merchant faq

g The Endpoint is enabled.
h The Endpoint is disabled.

In case of a large amount of Endpoints, search can be used:

pic103 merchant faq

In order to monitor Endpoint activity, Key Performance Indicators (KPI) are used, such as Merchant earnings and others.
The KPI submenu opens by pressing the Detailed button on the Endpoint search screen. See details in KPIs Detailed View.
Click on the Endpoint name to open the detailed information about this Endpoint.

Endpoint details

Endpoint details screen contains information about configured options on this Endpoint, its ID, limits and linked Project. The Endpoint inherits its currency from the Project it’s linked to.
It is important to note that the Endpoint settings (such as limits, payment forms, client definition, etc) override the Project settings.
To view the filters configured on the Endpoint, use the “Fraud protection filters” tab.
To view the necessity of additional fields on payment form, use the “API Fields” tab.
To work with other configuration options, see the information below.

Message Templates

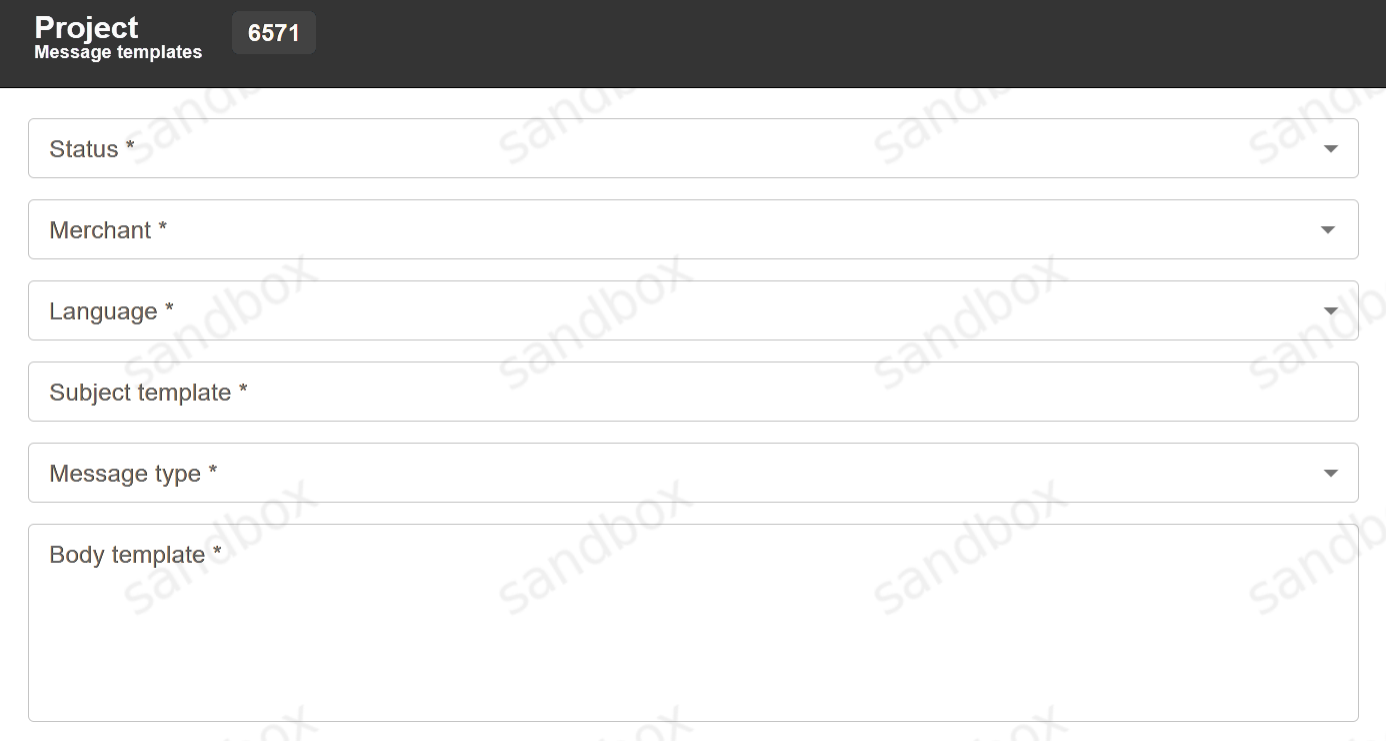
Message templates can be used to send SMS or E-mail messages to customer after each successful transaction. Merchant must provide their message server credentials to GitPay support manager in order to send such messages from Merchant address. Templates are created using the Template button. Example of filling the form:

pic105 merchant faq

Example of a message template in the form:

pic106 merchant faq

g Message sending is enabled.
h Message sending is disabled.

Payment Form

It is possible to configure custom payment forms on Endpoint or Master Endpoint. For configuration please see Forms Customization in integration documentation. Provide the customized forms to GitPay support manager for installation. Installed form names will be visible on Endpoint details screen.

Callbacks

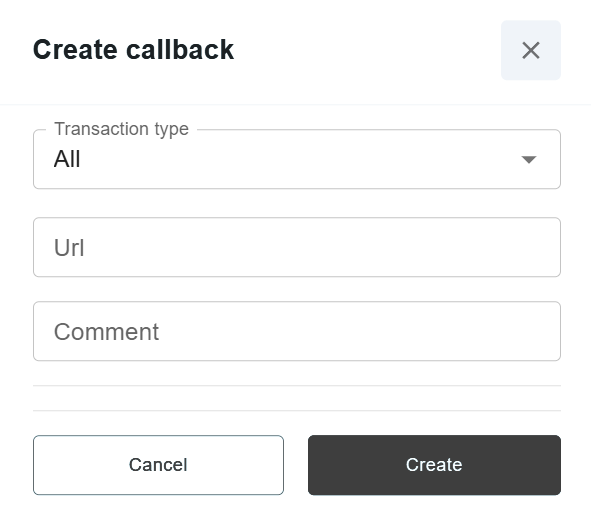
Callback can be configured at the Endpoint level by using Create Callback utility. To set up new callback, go to the bottom of Endpoint details screen and click the “Add Callback” button. There are several parameters, which can be defined in the configuration window:

  • Transaction type.

  • URL address - is the fully defined URL with all the parameters Merchant’s target page or script would require. Example: https://www.merchant.com/sale_completed.

  • Comment if it is required.


pic68 merchant_callback

Buy Now Button

Buy Now Button integration is relevant for Merchants who has limited portfolio of products to sell. It is the easiest way to integrate with GitPay. This way of integration doesn’t require much technical effort. Buy Now Button integration also allows Merchant (or Connecting Party which represents Merchant) to exclude itself from storing, processing, or transmitting Payer’s cardholder data or other sensitive payment details. Such data is submitted by Payer on GitPay hosted customer details form and payment form in PCI DSS certified environment.

Buy Now Button Setup

To configure Buy Now Button for Merchant’s website follow these instructions:

  • Find the relevant Endpoint

  • Go to Buy Now Items tab

  • Click Add item

  • Fill in the required fields.

Buy Now Button Required Fields

Parameter Name

Description

Value

Amount

Amount to be charged. The amount has to be specified in the highest units with . delimiter. For instance, 10.5 for USD means 10 US Dollars and 50 Cents.

Necessity: Required
Type: Numeric
Length: 10

Description

The item’s description.

Necessity: Required
Type: String
Length: 64k

redirect_url

The URL to the page where the Payer will be redirected after transaction is completed.

Necessity: Required
Type: String
Length: 1024

Destination

Destination to where the payment goes. It is useful for Merchants who let their payers to top up their accounts with bank card (Mobile phone accounts, game accounts etc.). Sample values are: +7123456789; gamer0001@ereality.com etc. This value can be used by the fraud monitoring system.

Necessity: Optional
Type: String
Length: 128

Payment tool

Payment methods.

Necessity: Optional
Type: String
Length: 128

Buy Now Button Payment Form Fields

To configure the fields to be shown on payment form, ask GitPay support manager to: • Go to API fields on the proper Endpoint. • Mark each needed API field as Visible and/or Required. • Save API fields and preview the payment form.

Warning

It is strictly advised to create separated Endpoints for Buy Now Button because activating this option might lead to errors with other types of integration. Also:
1. Buttons cannot be removed, only entire Endpoint can be disabled to stop transactions via Buy Now Button.
2. Transaction amount change on payment form will not be supported if any Buy Now Button is configured on this Endpoint.

Account Balance

Each Connecting Party has a merchant user account created in Payment Gateway. Merchant accounts can check current balances via Common tab on Endpoints. Balances also can be requested via API by Endpoint or by Merchant.

Note

Please contact GitPay support to enable this feature.

See example of endpoint window with current balances below:

balancesendpoint